
Getting Started
A Step-by-Step Startup Guide for the Accounting System
Chapter 1 Installing The Software
System Requirements
Installation Instructions
Multi-User Instructions
Setting up a Company
New Company Startup Wizard
Special Convenience Features
Chapter 2 Getting Around The System
General Rules
Entering Information
Limit Screens
Using the 5-Step Entry Process
Before You Begin
Brief Overview of Startup Steps
Detailed Discussion of Startup Steps
Chapter 4 Some Important Concepts
How Information Is Stored
How Information Is Processed
Back Up Your System... It Is Vital
Chapter 5 Tailoring To A Custom Fit
Chapter 7 Audit Trails and Record Keeping
Listings That Should Always Be Saved
Listings That Should Be Kept Current
Listings That Should Be Run Monthly And Saved
Work Log
Auditing a G/L Account
The construction accounting system is designed to save time and effort while maximizing the user's ability to perform many tasks. Because of computers' unique ability to store and retrieve information, this software is an excellent alternative to bookkeeping by hand. The new accounting system will allow the user to process, in minutes, information that previously took hours, and sometimes days to process.
As with any software system, the accounting system requires a certain amount of setup and preparation PRIOR to processing information. Most of these setup steps can be done by the user. For some of the steps, a tax or accounting consultant may need to be involved to ensure that tax laws and requirements are followed.
To promote a successful and trouble-free installation, it is important that the user thoroughly read this topic BEFORE setting up the accounting system.
The required startup data for the system is included in the download.
Sample Startup Data
The installation includes data for a fictitious construction company called Sample Construction Company. This data comes complete with everything set up properly and many transactions already posted.
Sample Startup Data
The installation includes data for a fictitious construction company called Sample Construction Company. This data comes complete with everything set up properly and many transactions already posted.
Have an Understanding of Construction Accounting
This accounting software is easy to learn and use. Although the user does not have to be an accountant to use the software, it helps to have some knowledge of accounting. The software manufacturer recommends one of the following for further reading on the subject:
The McGraw-Hill 36-Hour Accounting Course, Second Edition, by Robert L. Dixon, published by McGraw Hill
Handbook for Construction Accounting and Auditing, by Henry G. Pansza, published by Prentice Hall
We Are Here to Help
The Customer Service Department is staffed with helpful people trained to give assistance with the use of the accounting system. Our trainers and support technicians are skilled in the use and operation of this software and will be happy to answer any questions about the system.
For convenience, the software developer maintains a toll-free support Hotline. If a Service Agreement was purchased, questions may be answered free of charge. If a service agreement was not purchased, there will be a nominal per minute charge for this service. The toll-free number is listed below:
800-841-2666
Support Technicians are standing by, ready to answer operational questions. They may, however, refer the user to a CPA or Tax Consultant for some questions best answered by a professional of that field.
Chapter 1 - Installing the Software
Due to the storage and memory requirements of this software, it is very important that this chapter be fully reviewed and that system hardware meets the following criteria before continuing with the installation. Failure to do so could create less than desirable results.
Processor
The computer must have a Pentium 300 or greater microprocessor. Be aware, however, that running this software on a Pentium computer may result in greatly reduced speed in the running of the software. A Pentium 400 MHz processor (or higher) is recommended for new installations.
RAM (Random Access Memory)
A minimum of 512 MB of RAM (Random Access Memory) is required for this software to run. This means the system must have at least 512 MB of memory available. Check the available memory on the computer by running the System Settings program. Among other things, this window will display the amount of RAM installed in the computer.
Distribution
This accounting software is distributed by direct download from the A-Systems Website.
Operating Systems
This accounting software runs on 32-bit and 64-bit operating systems, including Windows XP, Windows Vista, Windows 7, Windows 8 and Windows 10.
Hard Disk Storage Space
Check to see if the hard drive has adequate space for this installation. This accounting software requires at least 2 GB (2,000,000,000 bytes) of available disk space (1 GB for the program and 1 GB for database files). In MS DOS, type ‘CHKDSK’ at the C:> prompt to determine the number of BYTES AVAILABLE ON DISK. It should be at least 2 GB.
If the system has met all of the above requirements, proceed to the installation instructions that follow.
To make the installation of the accounting software go as smoothly as possible, a program has been created to install the system automatically. Answer the questions on the screen as they appear. For the purpose of convenience, help screens have been added that explain each question in more detail. This installation guide will also provide additional information on each question. Each question that appears will have a default answer (an answer that appears immediately to the right of the question). If the default answer is chosen, simply press <Enter>. Otherwise, enter the desired answer. Press <ESC> at any time to terminate the installation program, or press the <Up-Arrow> to return to a previous question. Proceed now with the installation. For more information, consult the online help file.
When the CD is placed into the CD ROM disc drive, it will automatically load the following window:
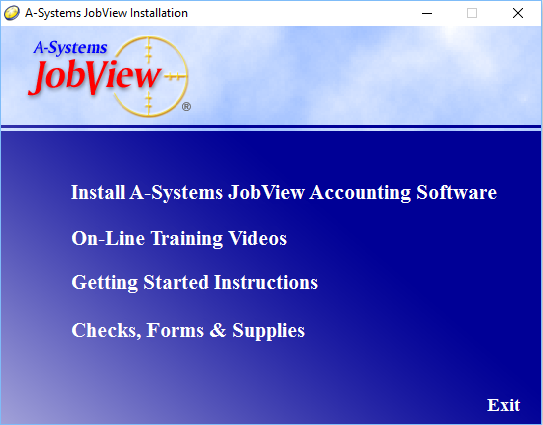
Click on Install Accounting Software to install the accounting system. Follow the installation program prompts to install the accounting system in the default directory.
When the installation is complete, a new accounting system icon will appear on the computer desktop.
Click this menu option to view the On-Line Training Video menu in your default web browser. From here, click on any training session to learn more about the desired topic.

Log Into the Program
Each time the program is started, the prompt will ask the user to login to a company. Press the lookup button to see the company list and select a company. Be sure to check the 'data path' to make sure it is pointing to the location where the program was installed. Construction Corporation of America, with its sample data, will be located there. If the data path is not correct, click on the Change button and make the correction by changing the data path. Then press the OK button. The next selection is for the User ID. Use the lookup button to select a user. Notice that there is a second company called 'Your Company Data.' When ready to set up a new company, click on 'Your Company Data,' and press the Change button. Change the Company ID from 'DAT' to whatever is appropriate for the company. Next, change the company name from 'Your Company Data' to the company name. Press <Ctrl> and <-Enter> simultaneously to finish this process.
If the software is being installed on a network, make sure that each computer using the accounting system reads control files from the same network folder.
To accomplish this, click on the Browse button next to the Company ID field. The following screen will come into view. The entry field at the bottom of this window shows the path for Control Files.

The entry in the field must be a folder which is accessible to every user. Every terminal that uses the accounting system must have the same entry in this window in order to run the program properly. If not, an error message will result and the main menu will not be reachable.
At this point, follow the instructions in the topic titled Add a New Company.
Once the new company has been created, log into the accounting system. Select your new company ID from the selection window. A screen will immediately come up that says User ID and Password. Don’t worry, nothing is wrong. A user, 'Guest User,' is already there, and it is not password protected. The first step is to change that user to a new user name. Then click on the lookup button, followed by the Change button, and put the desired name and User ID there. The program will ask for the system password in order to modify the user information. The System Password is the word, 'system.' Yes, it lacks creativity, but it is easy to remember. It will be possible to change it later. Type 'system' and press the OK button.
After a user name has been selected, the program window will be displayed. If this is new company, the New Company Startup Wizard will open automatically.
The following is a brief description of the New Company Startup Wizard, for a more detailed description view the New Company Startup Wizard help topic.
1. Welcome to the Wizard.
This is to inform the user that things are running correctly. If the financial data is not accessible, gather it now. A list of Vendors, Customers, Employees, Open Accounts Payable, Open Accounts Receivable, Jobs with Budgets and starting Financial Statement (opening balances.) is needed at this point.
2. Enter your company information here.
This is the basic information on the company.
3. Review your General Ledger Accounts here.
If Manual Create (Choice B above, the hard way) was selected, this page will be blank. Otherwise, Auto Create will have a Chart of Accounts to review and change at will. Note that when a new account is added, it must then be assigned to a place on the Financial Statement (Financial Statement Layout.) If this is not done, it will not show up on the Financial Statement.
4. Enter your Accounts Payable Vendors here.
This is the basic information on all of the vendors and subcontractors. Later, use the accounting system to add information about printing 1099’s and Tax ID numbers. This screen is the quickest way to get a lot of information into the system. Don’t worry about the details until after completing the multimedia training.
5. Enter your Accounts Receivable Customers here.
Again, this is the basic information on all of the customers. Add to this information after training.
6. Enter your Employees here.
First, select a State for their state of residence. If there are employees in more than one state, do them in groups by state, one state at a time. Later, after viewing the training session, add more details to each employee’s file.
7. Enter your Job Cost Code Dictionary here.
If Manual Create (Choice B above, the hard way) was selected, this page will be blank. Otherwise, Auto Create will already have set up the industry standard from the Construction Specification Institute (CSI).
8. Create your Jobs and Budgets here.
Set up each of the jobs. As usual, this is the basic information. Add more details later under Job Setup.
9. Enter your Open Accounts Payable Invoices here.
Enter all of the Open (unpaid) accounts payable invoices that are owed by the company.
10. Enter your Open Accounts Receivable Invoices here.
Enter all of the Open (unpaid) accounts receivable invoices that are owed to the company.
11. Enter your Beginning General Ledger Account Balances here.
The Chart of Accounts that was reviewed/created in Step 2 comes to the screen. Enter the balances from the cutoff statement ('beginning' balances) giving a continuation from the old accounting system. Note that all balances should be entered as positives. Be prepared for internal reconciliation. This prevents problems later. This means that if Accounts Payable Invoices totaling $50,000 were entered, an Accounts Payable Balance of $50,000 must be entered in the General Ledger. This assures that the Accounts Payable Module is reconciled to the General Ledger. The same goes for Accounts Receivable. When a balanced journal entry has been completed, the total at the bottom of the screen will be 0.00. This means debits equal credits. The Wizard will not allow an unbalanced journal entry to be posted. It just won’t do it.
12. Congratulations!
The New Company Start Up Wizard has been completed, and the system is now ready to process accounting entries. Enjoy.
You are in business. Now, let’s see what can be done.
When ready, edit the tax tables for changes from the first of the year. After completing the training sessions, add details to Employees, Vendors, Subcontractors and Customers. If desired, call the dealer for more detailed (tutorial) training available for a fee.
Read through this section in order to become familiar with the special Help and Lookup features of the accounting system. These features help make the software easy to use and easy to learn.
Help Screens
On-line, context-sensitive help screens can be accessed for any field by simply pressing the Help button. When this button is pressed, a window will appear in the middle of the screen and provide detailed information and instructions for that screen. Take as much time as is needed to read and understand the information. Press <ESC> and the help screen will disappear. Remember, the accounting system offers help for the screen that the cursor is in at the time the Help button is pressed. If additional help is needed for a different screen, move the cursor to that screen and press the Help button again. The online help file may also be accessed by clicking on the Yellow Question Mark on the top tool bar of the main screen, or press F1 to see the Help Contents.
Auto Lookup
Automated Lookup screens can be accessed at any point within the accounting system by simply pressing the magnifying glass button. There will then be the option of choosing which data file to view. Customers, vendors, employees, jobs and codes, and general ledger accounts are all available for Lookup. Use the <Up-Arrow> key to highlight the category wished to view and press <Enter>. Or use the mouse to click on the option wished to choose. Then use the <Page Up> or <Page Down> keys to scan through the chosen file. To modify the file, press the Insert, Change or Delete buttons. Press <ESC> to exit the auto Lookup.
Error Trapping
The accounting system will not ‘crash’ out of the system and back to windows. Instead, a message will appear on the screen if the system has run into an error. Do a 'print screen' of the error message - (press the <CTRL> and <P> keys simultaneously). If there is a question as to whether or not it is necessary to restore a backup and restart the process, or if the message reoccurs, it is advisable to contact the Technical Support Department.
Chapter 2 - Getting Around the System
The accounting program is a menu-driven system. To make entries, print reports, or perform other accounting functions, simply click on the menu icon for the desired module. A menu with that modules menu choices will appear. Click on the desired menu item.
When an entry screen is displayed, begin entering information. Pressing the <Tab> key or <Enter> allows for continuation to the next field. Pressing the <Shift> and <Tab> keys together will move the cursor to the previous field.
Underlined Letter +Alt
Pressing the <Alt> key and the underlined letter allows access to the option without clicking on it with the mouse. This is a useful shortcut for buttons and tabs.
The most commonly used are:
1. <Alt><C>
Pressing the <Alt> and <C> keys is the same as pressing the Change Button.
2. <Alt><D>
Pressing the <Alt>and <D> key is the same as pressing the Delete Button
3.<Alt><I>
Pressing the <Alt> and <I> keys is the same as pressing the Insert Button.
4. <Alt><P>
Pressing the <Alt> and <P> keys is the same as pressing the Print Button.
How Defaults Work
When the <Enter> key is pressed without typing in any information, the accounting system will anticipate what the response should be and respond by displaying this information. For example: if <Enter> is pressed in an Invoice Date field, the program will insert today’s date. If the field is a Due Date field, the program will automatically add 30 days to the invoice date. In timesheet entry, if the <Enter> key is pressed in the Regular Rate field for an employee instead of entering a rate, the rate from the employee’s record file will appear. These default features can save hundreds of hours of entering data over a period of a year.
Another time-saving feature involves entering dates and phone numbers. When entering dates, it is not necessary to enter the slashes as these will automatically appear. In a phone number field, the program will automatically insert parentheses around the Area Code and a dash after the three prefix numbers.
On-Line Help
Pressing the Help button will bring up a help screen at any point in the system. The <F1> key will bring up the help file's index and table of contents.
Saving Your Information
In many of the entry screens, the information entered on the screen must be saved before returning to the menu system. This is accomplished by pressing the OK button at the bottom of the screen.
When finished using an entry screen, leave the screen and return to the menu system by pressing the <ESC> key. Remember, if the OK button is not pressed to save the information on that screen, the information entered or edited will NOT be saved.
The accounting system has four methods of entering information: menus, approval questions, standard buttons and informational fields.
A. Menus
Most menus allow either typing the letter of the desired option or using the <Up Arrow> and <Down Arrow> keys to make a selection.
B. Approval questions
There are two main types:
1. Yes or No.
These questions require a 'yes' or 'no' answer. 'Yes or no' questions will normally appear in this manner: a description of the action will be provided, followed by the question.

In this case, pressing <Enter> alone will default to the first option listed. In the example above, pressing <Enter> will default to No. To select the Yes button click on it with the mouse or press the <Alt> key simultaneously with the <‘Y’ > key.
2. Finish or Undo.
These questions require a 'finish' or 'undo' answer. If entering timesheets, invoices, or receipts, the information can be reviewed and changed prior to making the information permanent. The information becomes permanent by answering ‘Finish’. 'Finish or Undo' questions will normally appear in this manner:
.png)
In this case, pressing <Enter> alone will default to the first option listed. In the example above, pressing <Enter> will default to Finish. To select the Undo button, click on it with the mouse or press the <Alt> key with the <U> key.
C. Standard Buttons
1. Insert, Change or Delete.
If entering timesheets, invoices, or receipts, the information can be reviewed and changed prior to making the information permanent. The Insert, Change or Delete buttons will make the information permanent. The option to insert, change, or delete will normally appear in this manner:
In this case, pressing <Enter> alone will default to the first option listed. In the example above, pressing <Enter> will default to Insert. To select the Change button, click on it with the mouse or press the <Alt> and the <C> key. To select the Delete button, click on it with the mouse or press the <Alt> and the <D> key.
2. OK and Cancel
In most program screens the OK and Cancel buttons will appear to allow the user to accept the entered information or to cancel and leave the screen.
In many of the entry screens, the information entered on the screen must be saved before returning to the menu system. This is accomplished by pressing the OK button. Remember, if the OK button is not pressed to save the information on that screen, the information entered or edited will NOT be saved.
When finished with an entry screen, leave the screen and return to the menu system by pressing the Cancel button. The option to accept or cancel will normally appear in this manner:
3. Print or Close
In all Report limit screens, the Print or Close button will appear. This is to allow for printing of the desired report or to close the screen without printing. The option to print or close will normally appear in this manner:
4. Select
The Select button allows for selection of the highlighted information. The Select button will normally appear in this manner:
D. Informational Fields
Informational fields allow information to be typed when needed by the system, such as vendor names, employee addresses, hours worked and dollars spent.
Miniature ‘Report Writers’ are available throughout the system for the user's use. The following screen is a typical example of these report writers. These screens are often to referred to as Report Limit screens.

By just pressing <Enter> a report can be printed with no limitations. However, it may be desirable to limit the information, thus saving time, paper, and money. For example: if a listing including only one fiscal period or a range of fiscal periods is desired, set that limit by checking the Select Fiscal Period box. It is possible then to specify which fiscal period or range of periods is wanted for viewing.
The same could be done to limit the printed information to only include a single General Ledger Account or a range of Jobs. Perhaps it would be nice to only print a group of codes to better analyze a small portion of a job’s activity. When all range selections have been made, click on the OK button and proceed to print the report.
Using the 5-Step Entry Process
Live data is put into the system using the 5-Step Entry Process.
This process is the same for entry of timesheets, A/P invoices, A/R invoices, cash receipts and general ledger transactions. Learn it once, and data will always be entered correctly.
1 - Enter...
The first step is to enter the information into the entry screen, assigning costs to correct Job Cost Codes or G/L Accounts.
Payroll entry programs include Timesheet Entry, Deduction/Other Pay Entry and Handcheck Entry. Accounts Payable entry programs include Trade Invoice Entry and Subcontract Invoice Entry. Accounts Receivable entry programs include Trade Invoice Entry, Progress Billing Entry and Receipts Entry. The only General Ledger entry program is Transaction Batch Entry.
2 - Proof List...
Each of the entry programs is followed by a Proof Listing option. This proof listing shows all the entries in the Batch and their corresponding cost distributions.
Proof Listings are printed out so that the entries can be compared to the original documents (timesheets, invoices, etc.) for accuracy. Highlight any entries that need to be changed.
3 - Edit...
In most cases, the user can return to the original entry screen to edit entries. For example: it is possible to go to the Invoice Entry screen to make changes to one of the invoices. Simply enter the Reference number from the proof listing and the computer will bring the invoice to the screen for editing.
In some cases, there is a separate program for editing entries. For example: General Ledger transactions can only be edited using the Transaction Batch Edit option.
4 - Backup...
Once entries are proofed and corrected, a backup copy of the data MUST be made for safety reasons. The posting process is the most volatile process in the system. If anything happens to the computer during the posting process, the transactions may be only partially posted to the permanent files. When this is the case, there is no other recourse but to restore a backup done prior to the posting and to begin the posting again.
See Chapter 4 for more information about making backups.
5 - Post...
The last step of the process is to post the information to the desired fiscal period. During this posting, the information is written to permanent job cost, general ledger and history files. Reports are generated which describe the transactions and their effect on the permanent files.
Remember, learning this 5-Step Entry Process now will provide a head start on learning each of the individual modules.
Chapter 3 - Starting Your System
To ensure a happy and successful experience using the accounting system, there are several things that must be completed BEFORE processing the accounting and job cost information. Once a certain point has been reached, it will be possible to start processing information while still finishing some of the setup. Within a very short time, the very first payroll can be processed, or the first invoices can be posted. Please remember that proper operation depends on entering proper information. Rest assured that by following the steps below everything will start out right!
These tasks should be completed in preparation for processing information using the accounting system. All of the information gathered here will be required when starting the program.
Task 1 - Gather Vendor and Customer Information
Organize the names of all the people and companies with whom business is done (i.e. all vendors and clients).
Task 2 - Gather Employee Information
Know where employee information is stored and have it readily accessible. This information includes each employee's name, address, city, state, phone, social security number, rate of pay, etc. Be able to specify whether the payroll cycle is (i.e. weekly, biweekly, etc.).
Task 3 - Finalize Your Chart of Accounts
Print a Chart of Accounts listing. Discuss the accounts with the CPA or tax advisor and decide if any changes need to be made. For example: the Chart of Accounts included with the system has job sales going into job income in the Income section of the Profit and Loss Statement. If the user is a developer, this may need to be moved to the Assets section of the Balance Sheet since the job may be an asset until it is closed.
Task 4 - Customize Your Cost Code Dictionary
Print a Dictionary of Cost Codes. This list is a standard cost code list developed to cover all phases of construction work. It is harmless to keep these codes in the dictionary since the user does not have to use the ones that are not needed.
Task 5 - Budget Your Jobs
Make a list of all jobs. If jobs are currently not tracked by phase, decide how many phases (or codes) are desired on each job. A number will need to be assigned to each job (i.e. 027, 110, 31A, etc.). List the phases, and decide which code types (Labor, Materials, Subcontracts, Equipment, General) need to be tracked on each phase. Assign each phase a five-digit number from the dictionary of cost codes. If a cost code does not exist for the phase in question, create it. Decide how to track that phase now. For example: a new code could be '06101 WOOD FRAMING'. On this phase, it may be necessary to only track the Materials used and the Labor needed to install it. In this case, simply assign two codes to this phase, 06101L and 06101M.
Task 6 - Select a System Startup Date
Decide on a point in time to begin the accounting process. Find out from the CPA when the fiscal period ends Select any date, past or future, as the System Startup Date. Set up the accounting fiscal periods to coincide with this schedule. If January 1, 2016 is the date designated as the System Startup Date, the proper fiscal period schedule would be:

Task 7 - Prepare A Startup Financial Statement
An accurate financial statement as of the System Startup Date is needed. In the case of our previous example, this would be a financial statement for the period ending December 31, 2015.
Task 8 - Gather Open Accounts Payable Information
Collect information on all accounts payable invoices remaining open as of the System Startup Date. These should be available at the time of entry.
Task 9 - Gather Accounts Receivable Information
Collect information on all accounts receivable invoices left unpaid as of the System Startup Date. All unreceived amounts should be brought together and available at time of entry.
BRIEF OVERVIEW OF STARTUP STEPS
Follow steps 1 through 7 to prepare the system for entry of live invoices, timesheets, etc. Steps 8 through 13 pertain to entry of beginning balances, and can be done at any time after steps 1 through 7 have been completed.
Step 1
Enter the company name, address, etc.
Step 2
Set up the TAX TABLES for Federal Tax processing and for the states in which work will be done.
Step 3
Enter all employees and employee information.
Step 4
Enter all vendors and vendor information.
Step 5
Enter all customers and customer information.
Step 6
Enter all open jobs and corresponding cost codes. Enter original and current budget dollars and units.
Step 7
Enter fiscal period setup and let the computer know which fiscal periods are open and ready to receive information.
You Are Now Ready To Enter Live Data
At this point, begin entering timesheets and invoices for processing. The following information may be entered over the next few weeks, or months, if necessary.
Step 8
Enter all accounts payable invoices that remain open as of the System Startup Date. Proof and post to the 'START UP' fiscal period.
Step 9
Enter all accounts receivable invoices remaining open as of the System Startup Date. Proof and post to the 'START UP' fiscal period.
Step 10
Print a Summary Trial Balance report for the 'START UP' fiscal period. Please make sure the ending balances for all Accounts Payable and Accounts Receivable accounts are correct.
Step 11
Bring the beginning balances current using G/L Transaction Batch Entry.
Step 12
Print another Summary Trial Balance report for the 'START UP' fiscal period. Make sure the ending balances for all accounts match the Startup Financial Statement.
DETAILED DISCUSSION OF STARTUP STEPS
Each of the startup steps mentioned in the previous section is spelled out here in more detail. If even more information is needed about any of the steps, use the Help key on each screen, use the online help file, consult the operator's manual, or call the software developer for assistance.
Detailed Step 1 - Enter your company name, address, etc.
Select Setup from the Master Menu. Then select Company Information from the Setup menu. The following screen will come into view. Enter the company name, address, city, state, zip code and phone number. This name will appear at the top of all reports and on important documents, such as W-2 and 1099 forms.

Detailed Step 2
Set up the TAX TABLES for Federal Tax processing and for the states in which work will be done.
Select Setup from the Master Menu, followed by Payroll Options. The following menu will appear.
1. Miscellaneous Payroll Setup
2. Standard Deductions
3. Other Pay Types
4. Federal Tax Tables
5. State & Local Tax Tables
6. Fringe Benefit Dictionary
7. Unions
8. Electronic Timesheet Interface
Before payroll information can be processed, it is necessary to enter the Federal and State tax tables. This can be done by consulting the CIRCULAR E booklet received from the Internal Revenue Service and the local state tax publications. If work will be done in states for which the user does not have a tax publication, request that information from the tax authority in that state It will be sent free of charge in most cases.
Option <4> Federal Taxes & Accruals and Option <5> State Taxes & Accruals will ask all the appropriate questions to allow for proper calculation of taxes and withholdings. If there are any questions while setting up these tax options, consult the Operator's Manual, or feel free to contact Software support at (800) 841-2666. Be sure all the necessary publications are accessible PRIOR to making this call.
To setup the state tax tables, select State & Local Tax tables from the Setup Payroll menu. The following screen will come into view. This screen is a "Menu of States". New states may be added or data for existing states may be edited or deleted through this screen. Note: States are identified by the standard U.S. Postal Service codes. The accounting system allows entry of state tables for all states plus the District of Columbia. For any state that is chosen, the following items may be set up:withholding tables, state unemployment rates and worker's compensation rates.

It is easy to maintain these tax tables without the cost of purchasing a tax update each year from the manufacturer. Each state allows unlimited tax withholding tables to be set up. Most states currently have two, 'Married' and 'Single'. A few states have added other tables for 'Head of Household', etc. Change the names of the tables and these names will appear in the employee record as each employee is set up later on.

Once the tables are set up, select each tab and enter the appropriate information for Unemployment, Disability, Worker's Comp, Liability Insurance and Local taxes. Each tab is selected by clicking on it with the mouse or by holding the <Alt> key and the underlined letter down at the same time. For example: To access the Liability tab , press the <Alt> key and the letter <L> at the same time.
Since Unemployment and Worker's Compensation vary so much from state to state, please rely on state agencies to procure the necessary information needed for proper calculations of these items.
Please Note:
To test whether these tables are set up correctly, backup the data files and run a test payroll PRIOR to performing the first live payroll posting.
Check all gross pay, tax, worker's compensation and deduction amounts against a hand-calculated payroll for accuracy. If there are any inconsistencies, review the Setup payroll section, the employee record entry screens and the accuracy of timesheet proof listing.
Detailed Step 3 - Enter all employees and employee information.
Select Payroll from the Master Menu. Now select Employee Record Entry. Press the Insert button or highlight the desired employee and press the Change button. There are several entries that must be completed. The information requested in these screens is necessary to allow for payroll posting and correct updating of employee files. Each screen is accessed by clicking on the tab or by pressing the <Alt> key and the underlined letter. For example: to access the General tab, press the <Alt> key and the <G> key at the same time.

<1>Edit Personal Data, Add, and Delete
In the General tab, enter the employee ID, name and address information. When entering the name, enter the LAST NAME FIRST, followed by a comma, and then the FIRST NAME. For example: John Doe would be entered as 'Doe, John.' David Williams Jr. would be entered as 'Williams Jr, David'.
<2> Edit Payroll Calculation Information
After the employee information has been entered, click on the Rates tab. The following fields in this screen MUST have information filled in for each employee in order to post and process payroll information correctly.

Marital Status
This field is necessary for Federal and State calculations.
Note: A STATE must first have been set up in the payroll setup options before it can be selected.
Withholding State
State tax will be calculated for this employee according to the tax tables of the state specified here.
Workers Comp State
Ordinarily, worker's compensation will be calculated according to the laws of the employee's state of residence: however, some states have formed a compact, which allows the employer to pay worker's compensation to any of the states included in the compact. For example: if the company is based in Utah and the employee is working in Nevada, worker's compensation may be paid under either Utah law or Nevada law. Worker's compensation rate tables are established for each state in State & Local Tax Tables.
Liability State
Enter the abbreviation of the State under which Liability is to be calculated for this employee.
Unemployment State
Enter the abbreviation of the State under which unemployment is to be calculated for this employee.
Pay Periods
The number of pay periods there are in a year must be entered. For example: Weekly = 52 pay periods per year.
Federal Exemptions
This is the number of exemptions each employee has when calculating their Federal Withholdings.
State Exemptions
Enter the number of State exemptions each employee has when calculating his State Withholdings.
Regular Rate
Enter the employee's regular hourly rate of pay. This amount will be the default when entering timesheets.
Overtime Rate
Enter the employee's overtime rate of pay. This amount will be the default when entering timesheets.
<3> Standard Deduction Data
Standard deductions should be set up first in the Payroll Setup section. Standard Deductions can be set up for an employee to deduct extra state or federal tax, insurance benefits, loan paybacks, garnishments, etc. Each deduction should have a description. This allows for easy identification of deductions during entry and on paychecks. For additional questions, refer to the section on Payroll.

This screen is accessed by clicking on the Deduction tab in employee entry. This screen shows the deduction, rate, quarter and year to date amounts for each deduction. Press the Insert button or highlight the desired deduction and press the Change button. From this screen, the limits and the amounts deducted to date for the Quarter and for the Year may be entered.

<4> Withholding Information
Click on the Federal tab to access this screen. This screen allows for easy entry of the amounts earned to-date by each employee. It also allows the Federal and FICA amounts already withheld this year to be entered. This information will appear on the W-2 when it is printed. These amounts can be entered for the month, quarter, and year. The W-2 for this employee may be viewed by pressing the Preview W-2 button.

Detailed Step 4 - Enter all vendors and vendor information.
Vendors include all companies and individuals from whom goods or services are purchased. The Vendors program is used to enter, edit, or delete vendor or subcontractor information. Select Vendors from the Accounts Payable Main Menu, and the following screen will come into view.
.png)
To Insert or modify a vendor's information, press the Insert button or highlight the desired vendor; then press the Change button. Initial setup requires only accurate entry of name, address and phone number. This is done through the General Information tab which will come into view by default when the Insert or Change button is pressed.
.png)
Press <Enter> through the rest of the fields to accept the default information supplied for each vendor if desired. Specify whether this company or individual is a vendor or a subcontractor. Enter this choice in the Miscellaneous tab, which is accessed from this screen by clicking on the Miscellaneous tab.
.png)
Detailed Step 5 - Enter all customers and customer information.
Customers include all companies and individuals who purchase goods or services from the company. The Customers program is used to enter, edit, or delete customer information. Select Customers from the Accounts Receivable Main Menu and the following screen will come into view. The customer's ID number, name ,phone number and contact person are listed.
.png)
Press the Insert button to insert a new customer. To change the information on an existing customer, highlight the customer name, and press the Change button. The following screen will come into view.
.png)
Initial setup requires only accurate entry of name, address and phone number. Simply press <Enter> through the rest of the fields to accept the default information supplied for each customer if desired.
It will be necessary to specify which type of customer this is. To track each invoice issued and match receipts to individual invoices, specify that this company or individual is an Open Item type customer. To track just the customer's current balance, specify that this is a Balance Forward type customer. Enter this choice in the Terms and Miscellaneous tab in the Customer Type field. The Terms and Miscellaneous tab is accessed from this screen by clicking on the tab or by pressing the <ALT> and <T> keys simultaneously.
.png)
Detailed Step 6
Enter all open Jobs and corresponding cost codes. Enter original and current budget dollars and units. Select Job Setup from the Job Costing Main Menu and the following screen will come into view:

Press the Insert button to insert a new job. To change an existing job, highlight the desired job and press the Change button. The following entry screen will come into view.

The computer will now be expecting a job number if this is a new job. Some examples of valid job numbers are 001, 027, 10A, 99Z. If this is an existing job, the computer will fill in the job information automatically.
If the job has not been set up, enter the overall original and current contract amounts for the job. A job income account may be specified from the General Ledger. Fill in all the information in the General Ledger tab.
Once the general job information has been entered or if the job has already been set up, click on the Budget tab with the mouse. The Budget tab will come into view.

Now set up budgets for the phases to be tracked on the job. The cost code numbers and descriptions come from the Dictionary of Cost Codes provided with the system.
It is important to note that it is possible to track costs on each job in as much or as little detail as desired.
For example: If the user is a home builder, set up codes (or job phases) to cover overall functions such as FOUNDATION, FRAMING, ROOFING, ELECTRICAL, PLUMBING, FINISH WORK, etc.
Or for more detail, further specify FOUNDATION as EARTHWORK REMOVAL, FOOTINGS, FOUNDATION WALLS, REBAR, FORMS, etc.
If a budget is entered for a FOUNDATION code, separate functions such as FOUNDATION LABOR, FOUNDATION MATERIALS, and FOUNDATION EQUIPMENT. If a subcontractor performs work on the FOUNDATION, set up FOUNDATION SUBCONTRACT and select a subcontractor from the vendor file.
Examples of valid cost code numbers might include 02100M, 03350L, 15020G, 02211E, 16000S, etc.
Print a listing of code numbers already available in the Dictionary through the Print Cost Code Listing button located in the 'Cost Codes' screen. Add or delete codes from this list using the 'Cost Codes Entry' option from the Job Cost Menu. (Never delete codes from this file if they have already been used in setting up a job.)
Detailed Step 7
Enter fiscal period setup and let the computer know which fiscal periods are open and ready to receive information.
From the Master Menu, select General Ledger. From the General Ledger menu, select Fiscal Periods. The following screen will come into view.
The above example shows how to set up the fiscal periods if the fiscal year coincides with the calendar year. Know which month the Fiscal Accounting Year begins and from which month the new accounting system will begin. It may be wished to insert some fiscal period time slots for things like Beginning Balances and Year-End Closing (adjustments). These adjustments can include any additional entries the CPA advises regarding bad debt, depreciation, etc.
No Month-End Closing Process Needed
The accounting system has a unique balance forward method of account balance processing which allows the user to process information in prior fiscal periods without lengthy and cumbersome month-end processing. Financial Statements may be run at any time during the month and these reports are as current as the most recent information entered and posted.
YOU ARE NOW READY TO ENTER LIVE DATA
It is now possible to enter live Payroll Timesheets and Payables and Receivables invoices for processing. The following steps may be completed over the next few weeks or months if necessary.
The next few steps pertain to entering the beginning balances. In order to enter these correctly, have a Startup Financial Statement available. This means the statement must be accurate as of the date the accounting system starts tracking finances. Also, have available all Accounts Payable invoices and Accounts Receivable invoices that were open as of that startup date.
Detailed Step 8
Enter all accounts payable invoices which still remain open as of the System Startup Date. Proof the report and post to the 'START UP' fiscal period.
Now, enter all of the accounts payable invoices which are (or were) due and payable as of the system startup date. These should have been gathered during the preparation phase. Follow the instructions in the Accounts Payable section of the operator's manual to enter all open accounts payable invoices. When these invoices are posted, make sure they are posted to the 'START UP' fiscal period. Remember to use the 5-Step Entry Process described in Chapter 2.
If this step is completed correctly, the ending balance of the Accounts Payable general ledger account for the 'START UP' fiscal period should have the correct startup balance.
Detailed Step 9
Enter all accounts receivable invoices that remain open as of the System Startup Date. Proof the report and post to the 'START UP' fiscal period.
Now, enter all accounts receivable invoices which are (or were) outstanding as of the system startup date. These should also have been gathered during the preparation phase. Follow the instructions in the Accounts Receivable section of the manual to enter all receivables invoices. When these invoices are posted, make sure to post to the 'START UP' fiscal period.
At the completion of this step, the ending balance of the Accounts Receivable general ledger account for the 'START UP' fiscal period should have the correct startup balance.
Detailed Step 10
Print a Summary Trial Balance report for the 'START UP' fiscal period. Make sure the ending balances for the Accounts Payable and Accounts Receivable accounts are correct.
From the General Ledger Main Menu, select 'Trial Balance'. Print a 'Summary Trial Balance' listing for the 'START UP' fiscal period. This report will show the balance of each account at the beginning of the period, all credits and debits posted to each account and the balance for each account at the end of the period.
Locate the Accounts Payable account. If all of the 'open' accounts payable invoices are entered correctly, the ending balance of this account should match the startup financial statement.
The same should be true of the Accounts Receivable account. If all 'open' receivables invoices have been entered correctly, the ending balance of this account should match the startup financial statement.
Also notice that the work in progress accounts and expense accounts may now have ending balances. For example: if an accounts payable invoice is posted to job 100, cost code 03000M, for $500, the JOBS IN PROGRESS - MATERIAL account will now have a balance of $500. If an accounts payable invoice in the amount of $125.50 is posted directly to the TELEPHONE account for the phone bill, the TELEPHONE expense account will now have a balance of $125.50.
Detailed Step 11
Make sure the the beginning balances are current using G/L Transaction Batch Entry. When completed correctly, this step will bring the ending balance column of the trial balance into perfect agreement with the startup financial statement. Have the current Summary Trial Balance Listing for the 'START UP' fiscal period and a copy of the startup financial statement readily available.
From the General Ledger menu, select Transaction Batch Entry. Refer to Transactions for instructions for using this entry program.
The balances of each of the accounts on the startup financial statement must be directly entered into the corresponding General Ledger account. For example: if the cash account on the startup financial statement has a balance of $29,423.00, enter a debit of $29,423.00 to the CASH IN BANK account. If the utilities expense account on the startup financial statement has a balance of <$2,435.84>, enter a credit of $2,435.84 to the UTILITIES account.
If the telephone expense account on the startup financial statement has a balance of <$4,550.50>, but the Trial Balance Listing shows an ending balance of <$125.50> from the posted open payables, enter the difference (a credit of $4,425.00) to the TELEPHONE account. This will bring the ending balance into agreement with the actual balance on the startup financial statement.
On a copy of the startup financial statement, mark off each account balance as they are entered on the screen. This will help make certain that the entry includes all of the balances, and is a balanced entry.
When all of the balances have been entered, run a proof listing and post the transaction Batch to the 'START UP' fiscal period.
Detailed Step 12
Go into Accounting Balance Back Overview. Click on the Trial Balance tab. Make sure ending balances for all accounts match the Startup Financial Statement.
The Prior Balance column will show all zeros. The Debit and Credit columns will show the total of the Debits and Credits that have been posted to each account. The Ending Balance column will show the balances of each account as they now stand. These balances should match the balances of the Startup Financial Statement. If they do not, adjusting entries must be made to bring them into line.
Note that the column totals for the Previous Balance and Ending Balance columns are both Zero. The column total for the Debit column matches the total from the Credit column. This indicates that the General Ledger is in balance. If these totals do not match, the fiscal period is out of balance and adjusting entries must be made.

The same information contained in the balance back overview screen may be obtained through printing a GL Summary Trial Balance Listing and the Job Cost Summary By Cost Type and Job Income Summary Reports.
Chapter 4 - Some Important Concepts
Computer File Handling
Everyone has seen a file cabinet. A file cabinet drawer is a collection of file folders each storing information about a single member of a larger group (i.e. Vendors, Customers, Employees, etc). These files are usually set in the drawer in alphabetical order so that the information can be easily retrieved.
The accounting system stores information on a disk much like is done in a file cabinet. A DATABASE is similar to a file drawer or a collection of file folders. For instance, a DATABASE might include information about all the Vendors or a collection of all the invoices received from the Vendors. A RECORD is a single entry within a DATABASE. RECORDS can be likened to files within the drawer. A RECORD may be a single invoice received, a timesheet for an employee, or information about one Vendor.
Information like invoices, timesheets, receipts and adjustments, are entered into temporary Batch FILES. These files allow the user to modify, or delete any of the information prior to making it permanent. When the information in the temporary Batch FILE has been reviewed for accuracy, permanent DATABASE files can be updated. The process of updating permanent files from temporary Batch files is called ‘POSTING’.
The accounting system posts information using a One-Step process. Unlike some other systems which require two or three processes to post information in the system, the system requires just one posting process to update all permanent files. This reduces the probability of operator error and helps to ensure that all reports run are up-to-date and contain the most correct information possible.
Back Up Your System... It Is Vital!
A backup is nothing more than a second copy of the information found in the accounting system data directory. The backup can be stored on floppy disks, zip disk, a removable hard drive, or another location (subdirectory) on the hard drive. Once the files are copied, they are available in case some of the files on the hard disk become lost or corrupted.
Making a regular backup of computer files is just like buying a life insurance policy. Regular premium payments are made each month and there is hope that it never has to be used. When it does need to be used, it is good to have it. Since computers are not perfect and are subject to component wear and tear, electricity blackouts, humidity and atmospheric conditions, making backups becomes an insurance policy against loss of valuable information and down time when a problem occurs.
The accounting software provides a backup program to perform data backups. This program is accessed through File >Backup / Restore Data Files from the main screen.

Backup Files From
Listed here is the directory in which the data files to be backed up are located. This cannot be changed from this screen. This field is automatically filled in from the path specified for the data files in the Login screen.
Backup Destination
This is the directory in which the data files are to be backed up. This field is automatically filled in from the path specified for the data files in the Login screen. Press the Change Destination button to change the path.
Backup Now (button)
This button, when pressed, will backup all the data files. After the Backup Now button is pressed, the following screen will appear. The Backup is now complete.
The software developer recommends two types of backups to cover data backup needs. These two types are described below.
Preposting Data Backup
Before each posting of information in the accounting system, a data backup should be made. This backup can be accomplished by making of copy of the accounting system data files from the subdirectory to a backup directory on the hard disk drive. This backup will be overwritten each time a subsequent backup is made.
This backup is accomplished, by selecting Backup Data Files from the Utility Programs menu. The system will erase the previous backup and make a quick copy of all the accounting system data files in the backup subdirectory.
Daily Data Backup to Floppy Disk
This backup is a ‘working’ backup and is performed on a day-to-day basis, usually at the end of the day.
It is recommended to have four rotating backup disks. These four disks should be labeled ‘Monday,’ ‘Tuesday,’ ‘Wednesday,’ and ‘Thursday,’
Each evening Monday through Thursday, use one of these disks to make the backup. On Friday evening, use a new formatted diskette for the backup and label this diskette with the date
Save this backup either on- or off-site in a safe place. This backup structure will insure that there are backups for each day going back one week, as well as one for each week prior.
This backup is accomplished by using the backup program described above. The system will back up all the accounting system data files to the floppy disk inserted in drive A.
THE RULE OF THUMB IS :Make a Backup when enough work has been done that it is not desirable to have to redo it.
Note: When backing up data, it is critical that all data files are include in the backup. When the data is restored, all data files must be restored. DATA FILES CANNOT BE SELECTIVELY BACKED UP OR RESTORED .
Chapter 5 - Tailoring To A Custom Fit
One outstanding feature of the accounting system is its flexibility. Since the software is used by many different kinds of contracting firms, it has been designed to allow a certain amount of customization through the Setup function.
With the accounting system, a Sample construction company was received. This company includes the Startup Data needed to begin using the software. Data files on this disk contain the file name extension ‘.TPS’ (The other files received, the ‘Program’ files, have the extension ‘.dll’ ).
The data on this CD has already been ‘Setup’ to ensure that the first information processing or ‘posting’ will be smooth and successful. As each of the Setup options is entered from the Master Menu, the user will notice that there are virtually hundreds of Setup options. These allow information to be processed in the way chosen by the user.
Examples: Accounts Payable
In Accounts Payable Setup, the system can be told to print a ‘Job Cost Summary’ at the end of each posting or, for a speedier process, the summary reports can be eliminated altogether. All invoices may be posted as ‘Ready-To-Pay’ and skip a sometimes lengthy ‘Payment Selection’ process.
Examples: Payroll
In Payroll Setup, the system can be told to print a ‘Job Cost Summary’ at the end of each posting or, for a speedier process, the Job Summary reports can be eliminated altogether. The computer can even be told to automatically calculate overtime pay after an employee has worked a certain number of hours in a given week.
Setup G/L Accounts
General Ledger accounts such as checking accounts, job costing control accounts and tax accrual accounts have been Setup for the user's convenience. The data may be used as-is, or the Setup accounts may be changed.
Defaults
The word ‘Default’ refers to the answer that will automatically be inserted by the system if the information is not provided. Most of these defaults are set up in Setup. For example: When entering timesheets in the Payroll system, the user will notice that the system provides the following answers as defaults:
* When the system asks for the pay period ending date, a date can be entered or just press <Enter>. The system will insert ‘Today’s Date’ as a default.
* When the system requires a worker’s compensation rate, one can be entered or just press <Enter>. The system will insert the rate that corresponds with the worker’s compensation code found in the employee’s record or associated with this cost code.
* When the system asks for an hourly pay rate, a rate can be entered or just press <Enter>. The system will insert the regular and overtime wages of the employee whose timesheet is being entered.
As each Setup option is being reviewed, it may be desirable to consult the on-line help screens to determine which settings are just right for the company.
Chapter 6 - Types of Databases
This section contains a brief description of the different database files contained in the accounting system.
General Ledger
The General Ledger is really the heart of the accounting system. Information from all other modules funnels here.
The General Ledger has been equipped with a unique balance forward system. This feature removes the need for the ‘Month-End Closing’ procedure usually necessary with other accounting systems. The General Ledger also provides the ability to work with 18 months (or ‘Fiscal Periods’) at a time.
Chart of Accounts
Each record in this file represents one general ledger account. The file holds account descriptions and balances for each of the 18 fiscal periods.
Transaction File
Each record in this file is a transaction posted from Accounts Payable, Payroll, Accounts Receivable or the General Ledger system itself.
Accounts Payable
Accounts Payable organizes and reports all payments due to the Vendors and Subcontractors.
Vendor File
This file stores information about each of the vendors. The information includes address, phone number, year-to-date paid amounts, discounts, payment terms, etc.
History File
Each posted invoice is stored permanently in this file. Some of the information stored includes the invoice number, date entered, date due, description and invoice amount. The file also keeps track of which invoices have been paid, which are overdue, etc.
Temporary Batch File
When invoices are first entered into the computer, they are stored in a ‘Temporary Batch File’. Here the information can be edited or deleted before it is posted to the permanent ‘History File’. After the posting takes place, this file is deleted until additional temporary invoices are entered.
Accounts Receivable
Accounts Receivable organizes and reports information about the customers and their outstanding debt to the company. Using this system the user can generate invoices, enter receipts and print reports and statements with aging information.
Customer File
Customer addresses, phone numbers, terms, etc. are stored in this file.
History file
All invoices and receipts posted in the system are stored permanently in this file
Payroll
This module greatly simplifies sometimes difficult payroll tasks. Once payroll Setup options are set, weekly payroll entry consists mainly of entering the timesheets for each employee, posting the information and printing checks. The accounting system automatically calculates and withholds taxes and deductions. It even keeps track of all amounts for W-2 printing at the end of the year.
Employee File
This file holds information about each employee such as: address, social security number, birth date, hire date, home state, pay rates, etc. The file also contains quarter-to-date and year-to-date earnings and withholding information.
History File
Each timesheet posted into the system is stored in this file. From this file, a listing can be printed of what any employee has been paid this year or since he/she were hired.
Job Costing
The workhorse module of the accounting system is the flexible Job Costing system. Each job can be followed with simplicity or with exacting detail. The six costing categories: Labor, Material, Subcontracts, Equipment, Burden and General are available for each costing phase. When entering budgets and tracking costs on each job, the user knows the exact location of the work being done.
Dictionary of Cost Codes
This file contains the listing of codes or phases from which to choose to set up budgets for each job. Codes can be added or deleted to make this file unique.
Job File
This file contains the cost codes and associated budgets for the jobs to be set up. Each record shows a dollar and unit budget for one cost code, as well as the associated costs-to-date and units used. From this file Job Cost Analysis reports can be printed that will keep the user informed about the progress of jobs.
Setup
‘Setup’ refers to the ability to customize the accounting system to the needs of the company. Many of the default answers that are used in the system are stored in either of two files. These defaults can be modified or ‘Set up’ through the Setup Menu.
System File
The System File stores the company name, address and phone number. In addition, it tells the system which general ledger accounts will be affected when dollar transaction amounts are posted during normal processing. For example: this file will tell the system the number of the checking account for cash transactions and the numbers of the federal and state tax withholding accounts for payroll calculations.
Tax File
This file stores the special tax processing information for each state. The information stored here can be updated each year as new tax changes are made. the accounting system does not require that a tax update disk be purchased each year, the tax changes can be made manually. To make tax changes to Federal Tax tables, go to Setup>Payroll Options > Federal Tax Tables. To make tax changes to Federal Tax tables, go to Setup>Payroll Options > State & Local Tax Tables.
Chapter 7- Audit Trails and Record Keeping
The computer will automatically print out listings of transactions that have been posted. These listings are called ‘hard copies’ and should be kept in binders. These listings show on paper which accounts have been affected by entries of invoices, checks, etc. Office procedures should be established and maintained that can allow easy access to needed information.
A workable audit trail must include hard copies produced by the computer when work is performed. When it comes right down to it, anyone who wants to audit a company (State Tax Auditor, IRS, etc.), really wants to look at listings and reports regardless of how much information is kept on the computer.
Listings should be kept in binders specially designed for continuous form paper printouts. These binders are available at most office supply stores. We recommend that eight to ten binders are purchased to start out with. When properly labeled, these binders will allow the user to organize work very efficiently.
In addition, in the event of a major computer hard disk failure, printouts would be an invaluable source in helping recover information that might otherwise be lost forever. With that in mind, we recommend keeping the following printouts produced by the accounting system.
Listings That Should Always Be Saved
Final Proof Listings
All Postings with General Ledger Summaries (combine these in the same binder in order of processing)
Listings That Should Be Run As Needed To Be Current
Listing of Vendors
Listing of Employees
Listing of Customers
Listing of Chart of Accounts
Listing of Dictionary of Cost Codes
Listings That Should Be Run Monthly And Saved
GENERAL LEDGER
*Transaction Listing, (append additional transaction lists to previous months lists.)
*General Ledger Detail by Account Listing
*Financial Statement
*Trial Balance
ACCOUNTS RECEIVABLE
*Aging Report
ACCOUNTS PAYABLE
*Posted Invoice Analysis
*Open Invoice Analysis
PAYROLL
*Employee Detail Listing
*Payroll End of Quarter Report
JOB COSTING
*Job Cost Analysis Report (Complete)
A notebook should be purchased and all work done on the computer should be recorded or logged. This notebook should contain the following columns:
|
DATE |
OPERATOR |
BACKUP # |
Work Done |
|
11/10 |
Bob |
A1 |
Backed up data |
|
11/11 |
Diana |
|
Entered A/P invoices received from November 10 to 12. |
|
11/12 |
Diana |
A2 |
Backup Data, Post A/P Invoices |
|
11/12 |
Bob |
|
Entered new employees, changed pay rates for employee #24 & 52 |
|
11/116 |
Bob |
|
Entered timesheets for pay period ending 11/13 |
|
11/18 |
Bob |
A3 |
Backed up Data |
This log should be kept without fail. If for any reason it is necessary to restore data to a given date, there is a ready list of work needed to be reentered and reposted to bring the program to the current time. Without this log, recovering from an error would be a guessing game at best.
Job Costing is simply a funnel for job related information processed by the system.
A Job Cost Analysis Report provides budgets for each phase of the job along with the current costs for each phase. Using the following audit method, the user is able to verify the costs on this report and check to see if all of the costs were correctly processed.
All costs for a cost code come from General Ledger transactions at the time of posting. At any time, the Job Cost Detail Listing option can be selected from the Job Cost Report Menu. This report allows the printing of the actual transaction detail from the General Ledger for a single job and a single cost code. The sum of these transactions should equal the total cost to date for that cost code as shown on the Complete Job Cost Analysis Report.
With this report the user can review each transaction to see if they are valid, or what types of postings are affecting the costs for that code.
For most reporting needs, the General Ledger Detail by Account option will be selected. This report quickly prints transactions posted to a single fiscal period or to a range of fiscal periods. This report follows a unique set of record pointers (called LINKS) that allows the accounting system to retrieve the information quickly even though there might be thousands of transactions in the General Ledger Transaction File.
If the CASH account is being audited and there is suspicion that the figures are not what they are supposed to be, the following audit method can be used to verify or disprove that amount.
Select the Transaction File option from the General Ledger Report Menu. Limit the report to print only transactions for the SAME LIMIT SETTINGS for which the General Ledger Detail by Account Report was set. This report scans the file sequentially for any transaction within the limit range selected. The result of these two reports should match, thereby verifying the correctness of information processed.
General Ledger
The General Ledger is the heart of the accounting system. A general ledger is made up of a number of Accounts, each of which maintains either a credit or debit balance. All accounting transactions that originate from Accounts Payable, Payroll, and Accounts Receivable processes will affect the general ledger accounts.
Account
This is an element in an accounting system that is used to classify and summarize measurements of business activity.
Chart of Accounts
This is a complete listing of all account titles and account numbers in the ledger.
Financial Statements
To assess the financial position of the company at a given time, a ‘Financial Statement’ may be printed at any time. This statement consists of two parts; the ‘Balance Sheet’ and the ‘Income Statement’.
Balance Sheet
The Balance Sheet or ‘Statement of Financial Position’ is a report that lists the company’s Assets, Liabilities, and Equity as of a specific point in time.
Income Statement
This statement shows the profitability of the company. It summarizes expenses and revenues to arrive at a ‘Bottom Line’. It is sometimes called the Profit & Loss Statement (P & L).
Trial Balance
This is a listing of the General Ledger accounts and their credit or debit balance. Use this report to determine whether credits equal debits in the recording process.
Payroll
Payroll is a system of keeping records on all employees, tracking the amount of time they work and compensating them for the time they work. Payroll also includes withholding a certain portion of the employee's pay for taxation, insurance and other requirements.
Employee
This is an individual to whom wages are paid and from whom taxes are withheld.
Employee Record
This is a computer file that stores information about an employee. This information includes such things as: name, address, social security number, date hired, regular hourly wage, etc.
Timesheet
A timesheet is a form used by the employee to record the hours he/she has worked during a pay period. This form can also be used to specify on which projects the employee worked. The information from the timesheet can then be entered into the computer through a timesheet entry program.
Payroll Posting
This process reads each of the entered timesheets and performs the following functions:
1. Calculates all appropriate taxes.
2. Summarizes all information necessary to print a payroll check.
3. Updates each Employee’s record with weekly, quarterly and yearly wage amounts.
4. Creates a permanent record of the payroll check for future review.
5. Makes all necessary transactions to the General Ledger.
Employee Detail Listing
This is a report containing information from payroll checks and withholdings for the past month, year, etc.
Accounts Payable
Accounts Payable refers to the amount of money the company owes to creditors for materials or services that have been purchased.
Vendor
This a person or company from whom materials or services were purchased.
A/P Invoice
This is the invoice received from a vendor requesting payment for goods or services that were purchased. When entering this invoice into the computer, it becomes an ‘Open Invoice’.
A/P Posting
This process reads each of the entered invoices and performs the following tasks:
1. Updates the Job Costing portion of the system with amounts and quantities used on different jobs.
2. Updates each vendor record with the amount of the invoice.
3. Inserts the invoices into a posted invoice file to await payment.
4. Makes all necessary transactions to the general ledger.
Payment Selection
This is the process used to select any previously posted invoices for payment.
Note: If the company pays all invoices every 30 days, the Accounts Payable system may be set to post all invoices as ‘READY-TO-PAY’. If this option is used, the ‘Payment Selection’ process is unnecessary. All the user needs to do is run checks once each month.
If the office writes checks manually, invoices can be entered as ‘PAID BY HAND CHECK’. When these invoices are posted, the proper transactions will be made to the general ledger.
Posted Invoice Analysis
This report shows the status of any or all previously posted Accounts Payable invoices. It can inform the user which invoices are past due, within discount terms, or already paid.
Float
This term refers to the amount of time the payment of an invoice can be delayed past the actual due date without incurring any additional penalties. This option may be beneficial during times of especially tight cash flow.
Due Date
This is the date payment is due on accounts payable invoices received. When entering an invoice from a particular vendor, the accounting system will examine the vendor file and automatically assign a due date to the invoice. Usually, this due date is 30 days past the invoice date. Some vendors offer different payment terms. If these terms are recorded correctly in the vendor file, the accounting system will assign the correct due date on each invoice. This default can be overridden during entry.
Historical
A Historical Invoice is one already paid to a vendor. Enter Historical invoices in the accounts payable invoice entry program as a matter of record for past history information. This option will create a record in the history of that vendor but NOT record any General Ledger changes.
Handchecks
These are hand-written checks that have been given to a vendor PRIOR to entering the invoice into the accounting system. See ‘Payment Selection’ above for more information on entering Handchecks.
Accounts Receivable
Accounts Receivable refers to the amount of money owed to the business by business customers.
Customer
This is a person or an entity to whom goods or services have been sold. If these goods are not paid for in advance, the amount owed becomes an ‘Account Receivable’.
Accounts Receivable Invoice
This is the invoice generated and sent to a customer which itemizes the goods or services purchased and extends payment terms.
Receipts
When receiving money in payment for items sold to a customer, this money must be recorded as a ‘Receipt’. The method of applying receipts against the amount owed by the customer depends upon whether this customer is an ‘Open Item’ or a ‘Balance Forward’ customer.
Open Item
For this type of customer, the receipts must be matched to specific invoices that have been sent to the customer.
Balance Forward
For this type of customer, receipts are applied to the customer’s running balance.
Aging
This refers to the number of days between the date the invoice was sent and today’s date with respect to unpaid balances. Legal finance charges may be levied on balances older than 30 days.
Job Costing
Job
A job is a project that has been contracted to be completed for a customer.
Phase
This refers to a portion of the project for which the user wants to keep track of the costs. Examples include roofing, foundations, earthwork preparation, etc.
Job Number
Each job or project is assigned a number within the accounting system. This is a three digit number.
Cost Code
Each phase of a job can be defined by a Cost Code number. In the accounting system, this number is five numeric digits long. The Dictionary of Cost Codes included with the system is the industry standard cost code set as defined by the Construction Specifications Institute, or CSI.
Code Type
When assigning a cost budget to cost codes, there can be up to five different types of costs associated with each code. The six types are Labor, Material, Subcontracts, Equipment, General and Burden.
L-Labor
Timesheet hours are assigned this code type. These hours are updated from the Payroll Module.
M-Material
Budgets for material purchases are entered under this code type. Units used and dollar costs are updated from the Accounts Payable Module.
S-Subcontract
If an independent contractor is hired to do portions of the job for the company, the cost of the subcontract can be tracked with this code type. Subcontract costs are updated from the Accounts Payable Module.
E-Equipment
This type is used for tracking equipment costs on the job. Equipment costs are updated from the Accounts Payable module.
B-Burden
This type is used for tracking burden costs on the job. Burden costs are updated from the General Ledger module.
G-General
Any other items that relate to the job, but do not fit in the other categories are tracked using this code type. These items might include Permits, Licenses, etc.
Job Cost Detail
As part of the Job Cost system a listing of all transaction details that have been posted in the accounting system for a particular job can be received. This is extremely helpful in tracking down job overruns, entry errors, etc.
Job Burden
Any additional dollar amounts that need to be included as job costs that are NOT actual costs are generally referred to as ‘burden’. These costs include federal withholdings, worker's compensation, state withholdings, etc. the accounting system can be directed to collect burden costs either in a General Ledger Account, or a Specific Job Cost Code which must be the same on each job, otherwise, it is possible to Distribute the burden proportionately over all cost codes on each job. The accounting system comes already Setup for these burden amounts to be Distributed.
![]()